Free Crochet Pattern: The Sorrel Kindle Pouch
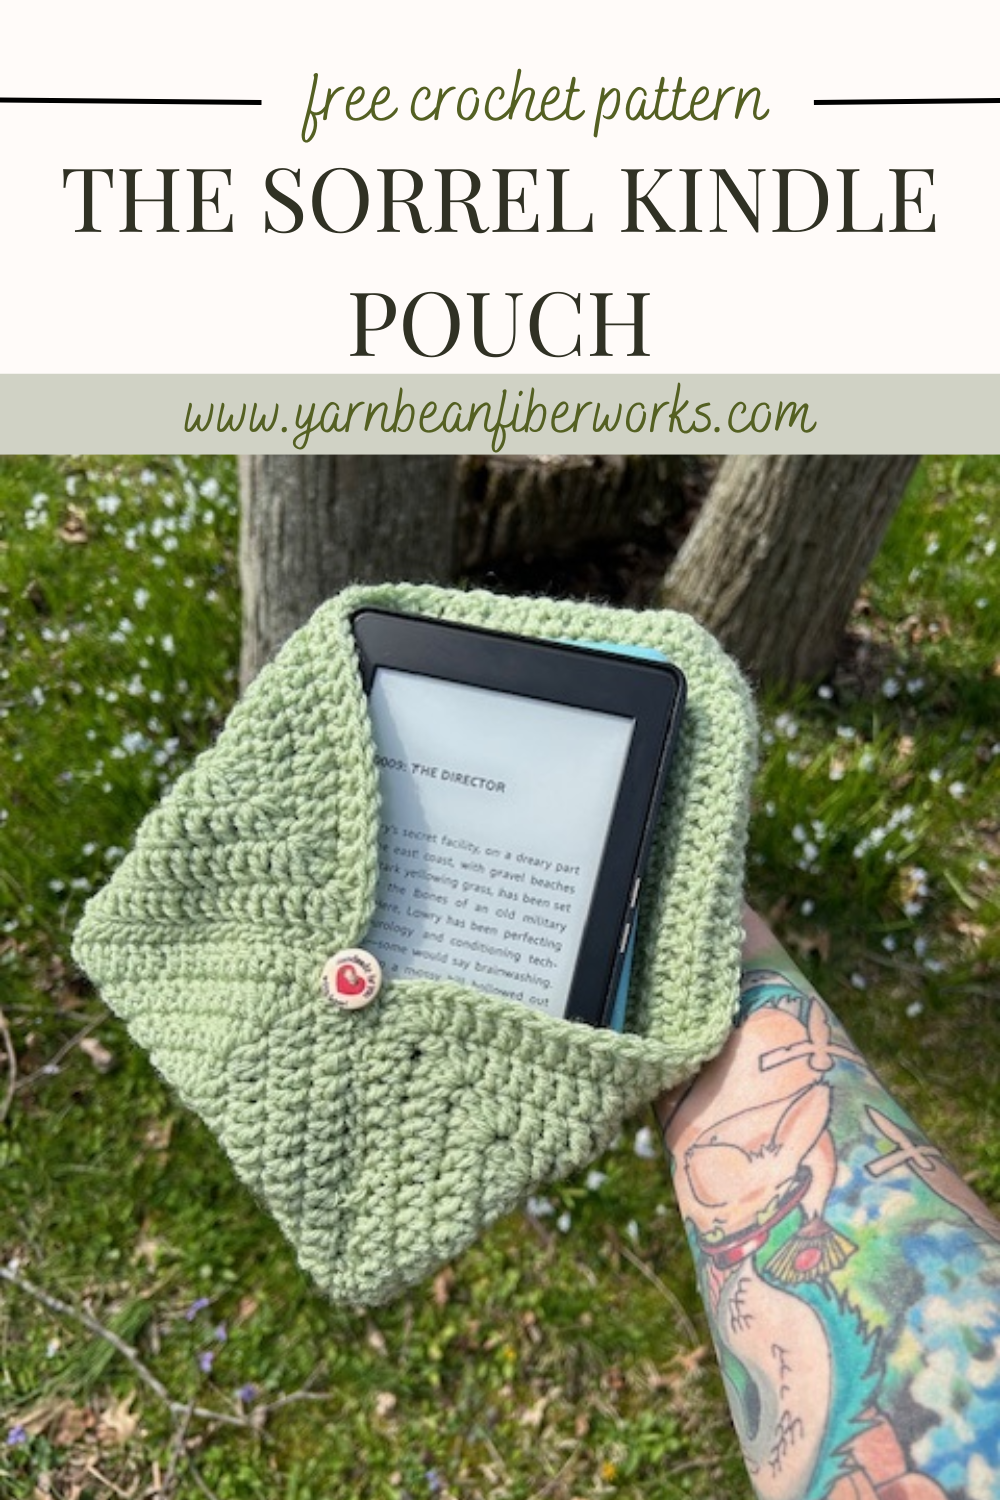
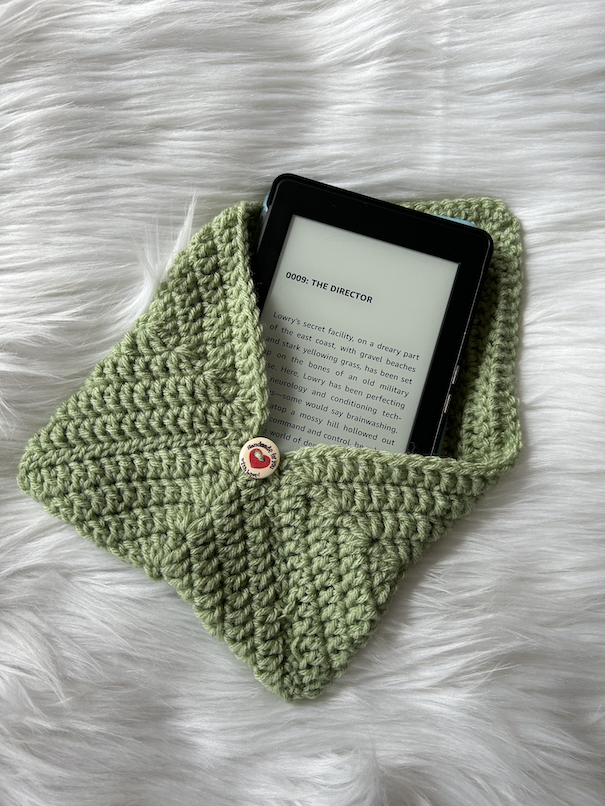
The Sorrel Kindle Pouch is a free crochet pattern, perfect for storing your kindle, nook, or small tablet. The pattern is worked by creating a large, solid granny square and sewing sides together to create a pouch.
Hello crochet friends! I am super excited to share my newest crochet pattern with you. I’ve had the idea for this kindle/e-reader pouch for a long time and I’ve finally been able to bring it to fruition!
I feel like reading and crafting are cozy hobbies that go hand-in-hand… am I wrong? I’m a huge proponent of owning a Kindle (I actually have the Paperwhite) because there are only pros and no cons. I’m serious. The Kindle is like the only Amazon product that I will rave about. The battery lasts for weeks, it’s slim and durable, and the storage on that baby is incredible. If you are trying to up your reading game, the portable Kindle Paperwhite is the perfect way to maximize your daily reading with little effort. And now - you have a cute crochet pattern to make for your new kindle. :)
I have had a kindle for YEARS, and other than having a hard-shell case on it, I have been desperate for a way to keep it safe and easy-to-find in my backpack or travel bag.
The finished product of this e-reader pouch is a 7 inch by 7inch inch pouch, worked in the round, with a decorative button to safely secure your e-reader. This e-reader is designed to be cute and functional, perfect for storing your e-reader for travel or at home.
Pattern Features
Step by step instructions, with photos
Learn to crochet a solid granny square
Easy to adjust size - this size of this pouch is easy to make smaller or larger depending on what you are making a pouch for - just increase or decrease rounds as you see fit!
Quick and easy - this pattern can be finished in a couple of hours and uses double and triple crochets, with an easy to memorize repeat
This blog post contains affiliate links, meaning if you purchase through these links, I earn a small commission (at no cost to you).
Supplies
5mm crochet hook - like this Clover hook from Amazon
Approximately 80 yards of a medium (4) yarn, like Red Heart Super Saver (I used the color Sage)
Scissors and tapestry needle
3/4 inch decorative button - I love these “Handmade with Love” wooden buttons from Amazon!
Terms and Abbreviations
Ch - chain
Dc - double crochet
Sl st - slip stitch
Tc - Triple crochet
* - repeat the directions between * and *
[ - crochet all of these stitches into the next stitch
I.e. [DC 2 , TC, DC 2] into the next stitch means to make 2 double crochets, a triple crochet, and 2 more double crochets all into the next stitch.
“2 DC vs. DC 2”
This pattern does have some increases at each corner of the pouch. You will often see “dc” with a number either before or after “dc”. In this pattern,
X DC - X DC into the same stitch
DC X - DC X into the next X stitches
where “X” is the number of stitches. The first few rounds will have more detailed instructions to help you get the hang of creating this granny square.

Instructions
To start, make a magic ring. Chain 4 and make DC 3 into the magic ring. * TC, DC 3 into the magic ring. * Repeat from * to * two more times. Slip stitch into the initial ch 4 to join in the round.

(After your chain 4 and first 3 DC.)

(After your initial TC, 3 DC into the magic ring.)

(After you have completed all of your stitches into the magic ring.)
Tighten the tail at the center of your magic ring to bring close the center hole.

Round 1: Ch 4 and DC 2 into the chain space. * DC 3 into the next 3 stitches. [2DC, TC, 2DC] into the TC from the previous round. * Repeat from * to * two more times. DC 3. 2 DC into the sl st space from the previous round. Sl st into the ch 4 from the beginning of the round to join.

(After your ch4, first set of stitches, and [2dc, tc, 2dc] into the first corner stitch.
At this point you will start to see the square shape emerge. If you are new to creating granny squares, I highly recommend placing clasp stitch markers into each of your TCs so they don’t get lost!

Round 2: Ch 4 and DC 2 into the chain space * DC 7 into the next 7 stitches. [2DC, TC, 2DC] into the TC from the previous round. * Repeat from * to * two more times. DC 7. 2 DC into the sl st space from the previous round. Sl st into the ch 4 from the beginning of the round to join.
Are you starting to notice the pattern in increasing in this granny square? Each round you are crocheting an additional 4 stitches along the sides of the granny square. :)
Round 3: Ch 4 and DC 2 into the chain space * DC 11 into the next 11 stitches. [2DC, TC, 2DC] into the TC from the previous round. * Repeat from * to * two more times. DC 11. 2 DC into the sl st space from the previous round. Sl st into the ch 4 from the beginning of the round to join.
Round 4: Ch 4 and DC 2 into the chain space * DC 15 into the next 15 stitches. [2DC, TC, 2DC] into the TC from the previous round. * Repeat from * to * two more times. DC 15. 2 DC into the sl st space from the previous round. Sl st into the ch 4 from the beginning of the round to join.
Round 5: Ch 4 and DC 2 into the chain space * DC 19 into the next 19 stitches. [2DC, TC, 2DC] into the TC from the previous round. * Repeat from * to * two more times. DC 19. 2 DC into the sl st space from the previous round. Sl st into the ch 4 from the beginning of the round to join.
Round 6: Ch 4 and DC 2 into the chain space * DC 23 into the next 23 stitches. [2DC, TC, 2DC] into the TC from the previous round. * Repeat from * to * two more times. DC 23. 2 DC into the sl st space from the previous round. Sl st into the ch 4 from the beginning of the round to join.
Round 7: Ch 4 and DC 2 into the chain space * DC 27 into the next 27 stitches. [2DC, TC, 2DC] into the TC from the previous round. * Repeat from * to * two more times. DC 27. 2 DC into the sl st space from the previous round. Sl st into the ch 4 from the beginning of the round to join.
Round 8: Ch 4 and DC 2 into the chain space * DC 31 into the next 31 stitches. [2DC, TC, 2DC] into the TC from the previous round. * Repeat from * to * two more times. DC 31. 2 DC into the sl st space from the previous round. Sl st into the ch 4 from the beginning of the round to join.
You have now completed your granny square. Fasten off, cut your yarn, and weave in your ends.
Sewing your sides together
In order to create the pouch, you will need to sew some of your sides together!
Cut a 2 foot piece of yarn and thread it through your tapestry needle.
Lay your piece flat, diagonally, as in the shape of a diamond, right side up. The top corner of your pouch should be the beginning of your granny square. You will notice that there are slight gaps at the beginning of each round where you sl st into the ch 4 space from the previous round - these will be your adjustable button holes.

Fold up the opposite 3 corners so that they all meet in the middle, like the shape of an envelope. This is where you will create your seams.

At one corner, line up your stitches. Thread your needle through the bottom two stitches at one corner and tie to secure. Thread your needle through the top of the stiches on both sides to secure the two corners together.

Line up the third panel with the center panel and continue sewing your piece together down the other side.

Secure and weave in your ends and turn your pouch inside-out.

Add a button
Attach and secure your button to the space where the three corners meet.
You do not have permission to sell, share, copy, or duplicate this pattern or my photos in any way. Do not use this pattern for a video, blog, or class tutorial. You may sell finished products made from this pattern, but please credit Yarn Bean as the pattern writer under all circumstances. I love seeing what others make from my patterns, so please feel free to tag me on social media! Thank you for following these rules.
Make sure to save this pattern to Pinterest to save it for later!